Showing posts with label Sprinkles. Show all posts
Monday, February 11, 2013
Happy Valentine's Day Cupcakes
I made these Valentine's Day cupcakes for a charity event my aunt was putting on. It was a great cause so I was glad to help. These are chocolate cupcakes with vanilla buttercream. They are topped with a variety of Valentine's Day candy. I picked up the adorable boxes at Dollarama (it's all about presentation!). Here are some photos:
Sunday, February 10, 2013
Horrible Cupcakes: Light Angel Food Cupcakes with Meringue Icing
Sometimes you have to blog the good, the bad, and the ugly!
So I started back on Weight Watchers last week. It is always torture for me to diet. Especially when I am a cupcake creator, pastry perfectionist, cake connoisseur, and dessert diva. Its killing me slowly, but Weight Watchers works and I can attest to it after losing 25lbs last year on the program. Lately, I have been slipping back into my bad habits though I haven't seen any weight gain because of my workouts. But I know that just because it doesn't show on the outside, it will catch up to me on the inside. So with a vacation in five weeks and standing up in a wedding in a few months, I decided to get back on track.
So why am I making these cupcakes? Well these cupcakes are 3 points on the Weight Watchers' program. Now before I begin my rant, it should be noted that this isn't a Weight Watchers' recipe nor will I list the site that I got the recipe from. So tip of the day: if a cupcake with icing is only 3 points, it is absolutely too good to be true! These cupcakes were horrible! And such a disappointment since I was looking forward to them all week. I was trying to make the situation better by not depriving myself of dessert, but now I'm hesitant to try another low point recipe. I knew that they wouldn't be as good as cupcakes filled with heavy cream and loads of sugar, but these were not even a little tasty! I can't describe the smell. Well I can describe it, but it would be slightly childish! Even my mother, who is a big fan of meringue, couldn't finish her cupcake. However, my dog loved them and was disappointed to see so many go into the garbage. So readers beware and try at your own risk!
At least the pictures turned out pretty :) |
Cake Recipe:
Yields 16 cupcakes
1/2 cup icing sugar
2/3 cup flour
1/4 tsp. salt
8 egg whites from large eggs
1/4 cup water
1 tsp. vanilla
1/4 tsp cream of tartar
1/2 cup sugar
Directions:
1. Preheat the oven to 325 degrees. Line a muffin tin with cupcake liners.
2. Mix icing sugar, flour, and salt in a medium bowl.
3. Blend egg whites, water, vanilla, and cream of tartar in a large mixing bowl. Beat until foamy. Add sugar slowly to the foamy mixture. Beat for 3-5 minutes on high speed.
4. Add dry ingredients to the foamy mixture. Fold together with a wooden spoon.
5. Scoop batter into the cupcake liners. Bake for 20 minutes or until tops are golden brown.
Icing Recipe:
2 egg whites from large eggs
1 tsp. vanilla
1/4 cup water
1/2 cup sugar
pinch of salt
pink food colouring
(I doubled the recipe to top all the cupcakes)
Directions:
1. Bring water and sugar to a boil in a sauce pan. Boil for 5-8 minutes.
2. While boiling the sugar, beat egg whites and vanilla in a bowl until foamy. Once the boiled sugar is ready, slowly pour the sugar mixture into the egg whites. Continue to beat with mixer.
3. Add salt and food colouring and beat until colour is even. Fill piping bag and frost cupcakes.
1 cupcake without icing - 87 calories or 2 points
1 cupcake with icing - 122 calories or 3 points
Friday, December 28, 2012
Mini Red Velvet Birthday Cakes
I made Mini Red Velvet Cakes for my mom's birthday this year. She loves red velvet cake. I am not a huge fan of it...maybe its because I am so frustrated by the time I finish (which always seems to be around 2 or 3 in the morning) that I don't even want to eat it. However, this red velvet recipe always gets rave reviews. I got the idea to create mini cakes from the blog Sprinkle Bakes. Her cakes turned out beautiful...mine were just okay. I always have good intentions and high expectations when baking this recipe, but I always fall a little short on presentation. Oh well, at least they taste great.
Red Velvet Recipe:
1 cup butter, softened
3 cups sugar
6 eggs
1 tbsp red food colouring
3 tbsp cocoa powder
3 cups flour
1 cup buttermilk
1 tsp vanilla
1/2 tsp salt
1 tsp baking soda
1 tbsp white vinegar
Adapted from: All Recipes
Directions:
1. Preheat oven to 325 degrees and grease mini cake pans.
2. Cream together butter and sugar. Add in one egg at a time.
3. Mix together red food colouring and cocoa powder. Add to creamed mixture.
4. Add flour, buttermilk, vanilla, and salt.
5. Combine baking soda and vinegar in a separate bowl until fizzy. Add to the mixture.
6. Blend everything smooth and add to the greased mini cake pans. Be sure not to fill to the top. They overflow easily.
7. Bake in the over for 18-20 minutes. Cool before icing.
Cream Cheese Icing Recipe:
2 - 8 ounce cream cheese packages, softened
1/2 cup butter, softened
2 cups icing sugar
2 tsp vanilla
Adapted from: All Recipes
Toppings:
Red, Green, and White Sprinkles
Square of Lindt chocolate
Red Velvet Recipe:
1 cup butter, softened
3 cups sugar
6 eggs
1 tbsp red food colouring
3 tbsp cocoa powder
3 cups flour
1 cup buttermilk
1 tsp vanilla
1/2 tsp salt
1 tsp baking soda
1 tbsp white vinegar
Adapted from: All Recipes
Directions:
1. Preheat oven to 325 degrees and grease mini cake pans.
2. Cream together butter and sugar. Add in one egg at a time.
3. Mix together red food colouring and cocoa powder. Add to creamed mixture.
4. Add flour, buttermilk, vanilla, and salt.
5. Combine baking soda and vinegar in a separate bowl until fizzy. Add to the mixture.
6. Blend everything smooth and add to the greased mini cake pans. Be sure not to fill to the top. They overflow easily.
7. Bake in the over for 18-20 minutes. Cool before icing.
Cream Cheese Icing Recipe:
2 - 8 ounce cream cheese packages, softened
1/2 cup butter, softened
2 cups icing sugar
2 tsp vanilla
Adapted from: All Recipes
Toppings:
Red, Green, and White Sprinkles
Square of Lindt chocolate
Tuesday, December 25, 2012
Merry Christmas: Chocolate Marshmallow Pops
A quick and very tasty treat. Chocolate Marshmallow Pops are great for a Christmas table centrepiece or an easy gift. I am not a huge fan of marshmallows (except for in S'mores), but the milk chocolate adds a great crunch along with the sprinkles.
Recipe:
- Milk Chocolate
- Sprinkles
- Marshmallows
- Lollipop Sticks
- Glass (Optional)
- Bow (Optional)
1. Place marshmallows onto sticks.
2. Melt chocolates in a microwave-safe bowl for 2 minutes or until smooth.
3. Dip marshmallow sticks into chocolate allowing excess to drip off.
4. Pour sprinkles onto chocolate. Do not dip into sprinkles...it makes a big mess.
5. Place in a cup to dry. You can also place them in the freezer for 2-3 minutes.
Adapted from: Glorious Treats
Merry Christmas!
Enjoy :)
Mag
Wednesday, December 5, 2012
North Pole Christmas Cupcakes!
Christmas is coming and there are a lot of holiday parties and holiday desserts that need to made and tasted! My dad needed cupcakes for his volunteer party at Habitat for Humanity ReStore. I saw this idea on Pinterest, but I just didn't like the photos I was seeing. Then my Crossfit friend posted a similar design online and I decided to give it a try. They turned out amazing. I appreciate the inspiration and check out her site, 3 Girls and A Cupcake for the most beautiful cupcakes!
Simple White Cake
1 cup white sugar
1/2 cup butter
2 eggs
2 tsps vanilla
1 1/2 cups flour
1 3/4 tsps baking powder
1/2 cup milk
Directions:
1. Preheat oven to 350 degrees and fill cupcake tins with baking liners.
2. Cream together butter and sugar.
3. Beat in one egg at a time. Add vanilla.
4. Combine flour and baking powder in a separate bowl. Mix into cream mixture.
5. Finally, beat in milk until smooth.
6. Bake for 20-25 minutes.
Once the cupcakes were cooled, I inserted a cream cheese filling into the centre of the cupcake. I then topped the cupcakes with my vanilla buttercream icing and sprinkles.
The North Pole toppers are easy to construct.
You will need:
- candy canes
- gumballs
- icing
- paper
- pen
Break the top off a cherry or peppermint candy cane and remove the plastic. Stick the candy canes into the cupcakes. Take the gumballs and add a dab of icing. Attach the gumball to the top of the candy cane (royal icing would work better for this if you have it available). For the sign, I actually purchased Wilton's Food Writers and flat mini white chocolate wafers. However, the Writers didn't show up dark enough on the white chocolate (which was very upsetting). So I had to improvise at 1 am. I simply used scrapbook paper and a pen to write North Pole. I then attached it to the candy cane with icing. This sign wasn't ideal since the icing left a stain, but sometimes your choices are limited. They still turned out beautiful and more importantly, they were delicious.
Simple White Cake
1 cup white sugar
1/2 cup butter
2 eggs
2 tsps vanilla
1 1/2 cups flour
1 3/4 tsps baking powder
1/2 cup milk
Directions:
1. Preheat oven to 350 degrees and fill cupcake tins with baking liners.
2. Cream together butter and sugar.
3. Beat in one egg at a time. Add vanilla.
4. Combine flour and baking powder in a separate bowl. Mix into cream mixture.
5. Finally, beat in milk until smooth.
6. Bake for 20-25 minutes.
Cupcake Papers |
Once the cupcakes were cooled, I inserted a cream cheese filling into the centre of the cupcake. I then topped the cupcakes with my vanilla buttercream icing and sprinkles.
Cream Cheese Filling |
Icing and Sprinkles |
The North Pole toppers are easy to construct.
You will need:
- candy canes
- gumballs
- icing
- paper
- pen
Break the top off a cherry or peppermint candy cane and remove the plastic. Stick the candy canes into the cupcakes. Take the gumballs and add a dab of icing. Attach the gumball to the top of the candy cane (royal icing would work better for this if you have it available). For the sign, I actually purchased Wilton's Food Writers and flat mini white chocolate wafers. However, the Writers didn't show up dark enough on the white chocolate (which was very upsetting). So I had to improvise at 1 am. I simply used scrapbook paper and a pen to write North Pole. I then attached it to the candy cane with icing. This sign wasn't ideal since the icing left a stain, but sometimes your choices are limited. They still turned out beautiful and more importantly, they were delicious.
Filling |
Very sad to say that my little helper, Buddy passed away a couple weeks ago. So this guy, Onyx has been staying up late with me to help clean up spills and trying to look cute for an extra cupcake :) |
Sunday, December 2, 2012
Minty Christmas Cupcakes
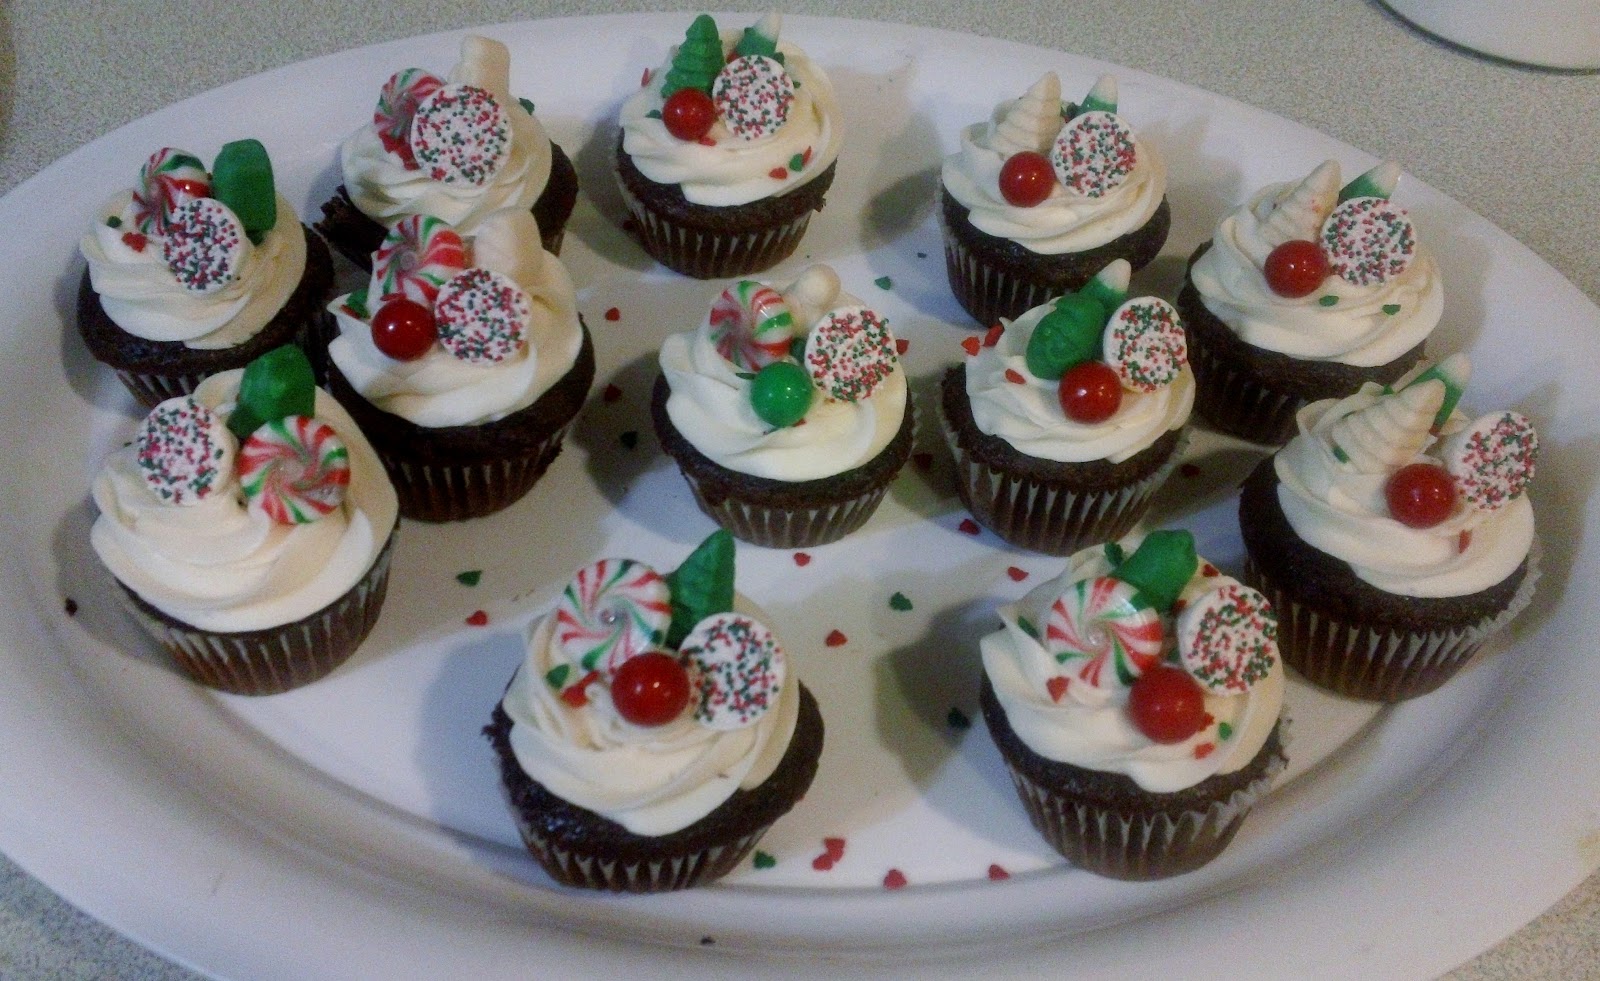
I also made these cupcakes for the Open House at my work. These are vanilla, marble, and chocolate cupcakes and they are served with a vanilla buttercream frosting. Finally, they are topped with sprinkles and mint candies. Simple, delicious, and one lady even referred to them as decadent :)
More Christmas and Holiday Treats are Coming...
Saturday, October 27, 2012
Halloween Dessert: Caramel Apples
Love buying Caramel Apples in the Fall. I always found that Candy Apples made such a sticky mess and stained everything red. But Caramel Apples... Caramel Apples are perfect. When made with peanuts they are a great combination of sweet and salty. After my mom was craving one the other night, I decided to find a simple recipe online and got to work.
Recipe:
6-8 apples
6-8 wooden sticks
2 bags of caramel chews
2 tbsp. milk
peanuts and/or sprinkles
Recipe adapted from All Recipes
Instructions:
1. Unwrap the caramels (probably the most time consuming part).
2. Melt the caramels with the milk in a pot. Mix continuously on low to keep it from burning. The mixture should be thick. Add more caramels if needed.
3. Wash apples and pierce with the wooden sticks.
4. Have your peanuts and/or sprinkles ready in bowls for dipping.
5. When the caramel is completely melted smooth, dip apples and allow the extra caramel to drip off.
6. Immediately dip into peanuts or sprinkles.
7. Allow the caramel harden and enjoy :)
Recipe:
6-8 apples
6-8 wooden sticks
2 bags of caramel chews
2 tbsp. milk
peanuts and/or sprinkles
Recipe adapted from All Recipes
Instructions:
1. Unwrap the caramels (probably the most time consuming part).
2. Melt the caramels with the milk in a pot. Mix continuously on low to keep it from burning. The mixture should be thick. Add more caramels if needed.
3. Wash apples and pierce with the wooden sticks.
4. Have your peanuts and/or sprinkles ready in bowls for dipping.
5. When the caramel is completely melted smooth, dip apples and allow the extra caramel to drip off.
6. Immediately dip into peanuts or sprinkles.
7. Allow the caramel harden and enjoy :)
Monday, October 8, 2012
Thanksgiving Candy Corn Cupcakes
Happy Thanksgiving to all! This year, I made Thanksgiving for my family. I did it once with my dad about 9 years ago. This year the parents were gone for the day so it was up to me. With the help of my brother, we turned out an amazing meal of epic proportions...
Apps:
hot spinach dip ,
mozzarella sticks,
deep fried pickles,
Dinner:
stuffing,
turkey,
mashed potatoes,
salad,
broccoli and cheese,
gravy,
chicken parm,
Desserts:
cookies,
fruit,
chocolate acorns,
AND
Candy Corn Cupcakes!
(click on the links to go to the recipes I used!)
Cake Recipe:
white cake mix
2 eggs
1 cup sour cream
1/2 cup milk
1/3 vegetable oil
1. Beat ingredients together and separate batter into two bowls. Use yellow and orange food colouring to dye batter.
2. Spoon yellow batter into empty cupcake papers. Top with the orange batter.
3. Bake at 350 degrees for 15-20 minutes.
4. Top with white buttercream icing.
5. Garnish with orange and yellow sprinkles and a candy corn.
Recipe adapted from: The Girl Who Ate Everything Blog
*Note: These don't actually taste like candy corn...they just look like candy corn!
Apps:
hot spinach dip ,
mozzarella sticks,
deep fried pickles,
Dinner:
stuffing,
turkey,
mashed potatoes,
salad,
broccoli and cheese,
gravy,
chicken parm,
Desserts:
cookies,
fruit,
chocolate acorns,
AND
Candy Corn Cupcakes!
(click on the links to go to the recipes I used!)
Cake Recipe:
white cake mix
2 eggs
1 cup sour cream
1/2 cup milk
1/3 vegetable oil
1. Beat ingredients together and separate batter into two bowls. Use yellow and orange food colouring to dye batter.
2. Spoon yellow batter into empty cupcake papers. Top with the orange batter.
3. Bake at 350 degrees for 15-20 minutes.
4. Top with white buttercream icing.
5. Garnish with orange and yellow sprinkles and a candy corn.
Recipe adapted from: The Girl Who Ate Everything Blog
*Note: These don't actually taste like candy corn...they just look like candy corn!
Subscribe to:
Posts (Atom)